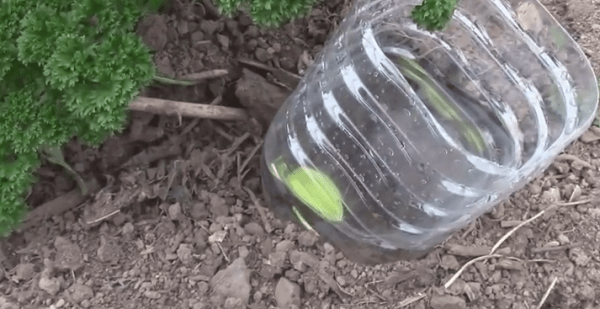
1. Water reservoir
You’ll utilize the half of the plastic bottle with the top. Puncture an opening through the top with a nail, and screw the top on. Embed the bottle half into the ground at the base of a plant, so the top is in the ground, and the opening is facing the sky. So, if you need to leave for a couple days, yet at the same time need your plant watered, fill the bottle before you leave, and the water will drip out gradually after some time, dousing into the soil.
2. Watering can
Take an entire plastic bottle and make a hole in the top. Fill the bottle with water. Flip around the bottle and squeeze it to water the youthful seedlings that could be harmed by bigger spouts of water.
3. Slug trap
Utilize any size bottle, but pick two. Simply ensure both are the very same size. Cut out two rectangles from the bottom of each bottle half. These will be the slug’s entryways. Then slot the bottle halves together, so the openings line up, and staple the two parts together. Fill the bottom with a little old beer, and insert the container into the ground. Slugs will walk in, but they won’t walk out.
4. Seedling guards
Cut a plastic bottle in half and then continue to cut out rings of plastic. Place each plastic ring around a seedling, to protect it from slugs and other bugs.
5. Seed storage
Get a clean bottle; make sure there’s no moisture in it. Use it to store seeds. (It works especially well for peas and beans.)
6. Mini greenhouse
Cut off the top of plastic bottles (with the cap on) and place them around your seedlings. The plastic traps the moisture just like a greenhouse. It can also protect against frost.
7. Annual planter
Take a bigger plastic bottle. Turn it on its side, and cut out a rectangle. Pierce holes in the opposite side, to serve as drainage. Fill it with compost and soil. Plant the seeds in the soil, and watch them grow.

